

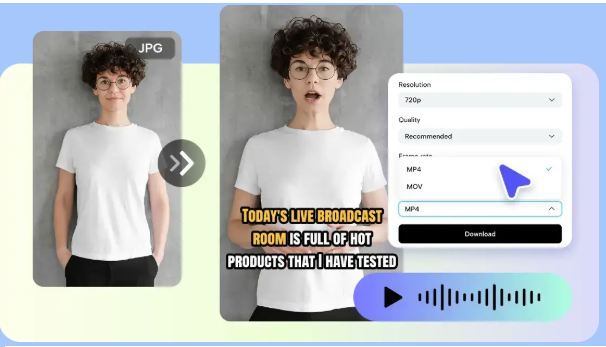
A single photograph captures a moment, but a video tells a story, and the gap between the two has long required expensive software and real technical skill. Many people have a library of meaningful images sitting untouched, simply because animating them felt out of reach. Modern photo to video technology closes that gap, transforming static pictures into smooth, engaging clips while preserving the detail and clarity that made the originals worth keeping.
This guide walks through how the conversion works, why quality preservation matters so much, and how to get results you will be proud to share. Rather than treating the process as a mysterious black box, we will break it into understandable steps and practical habits. Whether you want to breathe life into old family photos or produce polished content for an audience, you will finish with a clear sense of how to turn your images into compelling video without sacrificing the quality you care about.
How Photos Become Moving Video
Converting a photo into video involves adding motion, depth, and pacing to an image that originally had none. The technology analyzes the picture, identifies elements that can move naturally, and generates transitions that give the impression of life and dimension. Done well, the result feels intentional rather than gimmicky, drawing viewers into the scene instead of distracting them.
The critical concern throughout this process is preserving quality. A poorly executed conversion can introduce blurriness, distortion, or artificial-looking movement that undermines the original image. Good tools protect the source detail, applying motion in a way that enhances the photo rather than degrading it, which is exactly what separates a professional result from an amateur one.
Motion, Depth, and Natural Movement
The most convincing conversions add subtle, believable motion rather than dramatic effects. A gentle drift across a landscape or a soft parallax that separates foreground from background can transform a flat image into something that feels three-dimensional. These understated techniques respect the original composition while giving it new energy.
Depth is where the real magic happens. By interpreting the spatial relationships within a photo, the technology can create the sense that a camera is moving through a real space. This illusion is powerful precisely because it feels natural, and achieving it without introducing distortion is the mark of a high-quality conversion.
Why Preserving Quality Matters So Much
The whole point of animating a photo is to celebrate it, not diminish it. If the conversion sacrifices sharpness or introduces visual noise, you lose the very thing that made the image special. This is why quality preservation sits at the heart of any conversion worth doing, and why choosing the right approach makes such a difference to the final result.
High-quality output also determines how your video performs when shared. Audiences quickly lose interest in footage that looks degraded or artificial, while crisp, natural motion holds attention and encourages engagement. Investing care in preserving quality is therefore not just an aesthetic choice but a practical one that affects how your content is received.

Starting With the Right Source Images
Quality begins with your input. A sharp, well-lit photograph gives the technology far more to work with than a blurry or poorly exposed one. Before converting, take a moment to select images that are already strong, since the conversion enhances what is present rather than inventing detail that was never there.
Resolution matters as well. Higher-resolution images provide the detail needed for smooth motion and clean depth effects, giving you more room to crop and reframe without visible loss. Platforms such as Pippit AI are built to make the most of quality source material, so feeding them your best images pays off directly in the final

video.
A Practical Path to Great Results
Achieving a polished conversion becomes straightforward when you approach it methodically. The process rewards a little preparation and a willingness to refine, rather than expecting a perfect result on the first attempt. By working through a clear sequence, you keep control over both the motion and the quality of the finished piece.
Begin by choosing images that share a consistent mood or theme, especially if you plan to combine several into one video. Cohesion between shots creates a smoother viewing experience and makes the final clip feel deliberate. Once your selection is set, you can focus on how each image should move and how they connect together.
For dependable results, work through these steps:
- Select high-resolution, well-composed photos that suit the story you want to tell.
- Apply subtle, natural motion that complements each image rather than overwhelming it.
- Review the output at full quality, checking for any distortion before finalizing.
After generating your video, watch it carefully on the kind of screen your audience will use. Small issues that are invisible on a thumbnail can become obvious at full size, so this final review is essential. When the motion feels natural and the detail remains crisp, you know the conversion has preserved everything that made your photos worth animating in the first place.
Common Pitfalls and How to Avoid Them
The most frequent mistake is overloading a photo with excessive motion in an attempt to make it dramatic. This almost always backfires, producing an unnatural effect that draws attention to the technique rather than the image. Restraint is your ally; subtle movement nearly always reads as more professional and more believable.
Another pitfall is starting with weak source material and expecting the technology to compensate. Conversion enhances what exists, so a low-quality photo yields a low-quality video no matter how skilled the tool. Choose your best images, apply motion thoughtfully, and review at full resolution, and you will consistently produce results that honor your original photographs.
Bringing Your Photos to Life With Confidence
Turning still photos into video no longer demands specialized skills or expensive software, but doing it well still requires care and intention. The technology can add motion, depth, and life to your images, and when quality is preserved, the results genuinely honor the moments those photos captured. The difference between a striking video and a disappointing one comes down to your choices, from source selection to the restraint you show with motion.
Start with your strongest images, apply movement that feels natural, and always review the final output at full quality before sharing. Approached this way, photo animation becomes a reliable way to give your still images new meaning and reach. Your photographs already hold stories worth telling, and with the right approach, you can set those stories in motion without losing an ounce of the quality that made them special.