

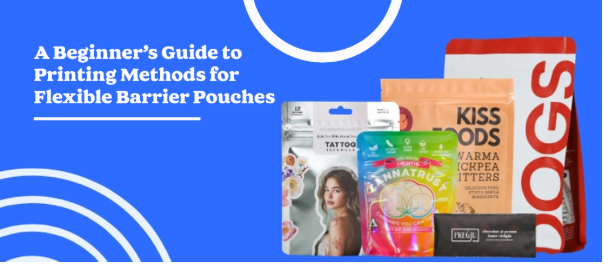
A Beginner’s Guide to Printing Methods for Flexible Barrier Pouches is a practical packaging question, not just a design theme. For food, supplement, pet treat, beauty, household, and specialty-product brands, the package must protect the product, support efficient operations, communicate clearly, and remain consistent from one order to the next. The central issue in this topic is the path from artwork and prepress through printing, lamination, pouch conversion, and final inspection. A visually attractive result can still fail if the structure is hard to fill, the material is poorly specified, or the final pack behaves differently from the approved proof.
A dependable process begins with measurable product information and ends with testing under realistic conditions. This guide explains how U.S. brands can move from a commercial goal to a production-ready specification. It also separates reasonable packaging benefits from claims that require product-specific evidence. That distinction matters for food contact, shelf life, environmental statements, and any promise about protection.
Define the Product Before the Package
Document the complete sale unit before choosing size, material, or graphics. Record maximum and minimum dimensions, weight, shape, surface sensitivity, temperature, moisture or oil exposure, sharp edges, and normal manufacturing tolerances. Use the largest and heaviest realistic samples rather than one ideal item. The relevant product set may include dry foods, supplements, pet products, beauty items, household goods, or other products suited to flexible packaging.
Map how the pack will be received, stored, assembled, filled, sealed or closed, labeled, displayed, shipped, opened, and disposed of. Identify who performs each step and how much time is available. Note where unexpected color, weak small type, registration movement, finish changes, or files built on an outdated dieline may occur. A written product-and-journey brief gives the converter a problem to solve and prevents the project from being reduced to a request for “premium quality” without an operational definition.
Turn Marketing Goals Into Measurable Requirements
Translate broad goals such as premium, convenient, protective, or affordable into observable results. A premium pack might require controlled color, clean edges, smooth opening, and consistent fit. Convenience may mean one-handed opening, clear instructions, or fast packing. Protection should refer to specific hazards and acceptance criteria. Affordability should be evaluated through total cost, not only price per unit.
For this topic, the specification should address digital, flexographic, or rotogravure suitability, white ink, color targets, plates or cylinders, and proofing. Rank requirements as essential, preferred, or optional. This prevents decorative additions from displacing a feature that controls performance. It also makes quotations easier to compare. When suppliers propose alternatives, ask which requirement changes, what data supports the recommendation, and whether a new sample or validation step will be required.
Use the Primary Anchor as a Real Buying Decision
When evaluating Custom Mylar Bag Printing, the keyword should represent a defined packaging format rather than a vague product label. Ask the supplier to state construction, dimensions, tolerances, materials, print method, finish, closure or retention features, packing quantity, and quality criteria. If the product is intended for food, supplements, cosmetics, or another regulated use, confirm that every relevant component is suitable for its intended contact and conditions.
Request a dieline and representative physical sample before approving production. Fill it with actual products and repeat the normal packing process. Photograph front, back, sides, opening sequence, shelf view, shipping configuration, and the customer’s first view. This reveals problems that a flat PDF cannot show, including blocked branding, difficult access, excessive movement, or information placed where folds and labels interfere.
Choose Materials by Function, Not Nickname
Packaging names used in the market do not fully describe performance. The starting material decision here is a multilayer film structure selected by measurable moisture, oxygen, light, aroma, chemical, and puncture requirements. Ask for measurable information that relates to the product and route. Depending on the format, that may include thickness or caliper, board grade, flute, barrier data, sealant layer, density, recovery behavior, recycled-content evidence, or surface compatibility.
Do not assume that a thicker material is automatically better. Excess material can increase cost, slow conversion, or transmit force instead of managing it. Conversely, reducing material without testing can create failures. Evaluate the complete construction, because inks, coatings, adhesives, windows, zippers, laminations, and inserts can change performance and end-of-life options. Keep supplier specifications with the approved sample so future reorders can be checked against the same baseline.
Develop Artwork on the Final Dieline
Build artwork only after structure and dimensions are stable. Establish safe areas, bleed, seals or glue zones, scores, cut lines, windows, barcodes, variable-data areas, and any surfaces that become hidden after forming. Use a clear hierarchy for brand, product name, variant, quantity, instructions, and required information. Small type should be reviewed at final printed size, not enlarged on a monitor.
Color targets should be defined with the printer rather than judged from different screens. Check how white ink, transparent areas, metallic effects, matte surfaces, uncoated board, or dark solids influence appearance. For a product range, use controlled positions and typography while allowing variants to differ through planned color or imagery. Version numbers, approval dates, and named approvers reduce the chance of an outdated file returning to production.
Plan Manufacturing and Conversion
Understand the sequence used to make the package. In flexible packaging, artwork may be separated, printed, laminated, cured, slit, formed, fitted with closures, and sealed into pouches. Each stage introduces tolerances that should be considered in the design.
Ask which setup costs apply and which changes trigger new plates, cylinders, tooling, dies, or proofs. Confirm lead time from final artwork approval rather than from the first inquiry. Discuss how units will be packed for delivery and whether they need time to condition before use. A schedule should include sampling, revisions, compliance review, production, freight, incoming inspection, and a buffer for correction. Launch dates built only around the press date are fragile.
Keep the Secondary Anchor Properly Integrated
The wider decision about custom packaging should be addressed several stages after the primary format is defined. It may describe the broader packaging family, a related structure, or the system that connects multiple SKUs. Use shared rules for logo placement, typography, product information, labels, testing, and supplier records while allowing each pack to meet its own physical requirements.
Create a packaging matrix with SKU, compatible products, dimensions, material, print version, features, storage location, minimum order quantity, lead time, and reorder point. Remove duplicate formats that perform the same job without a clear advantage. Standardization can simplify training and purchasing, but it should not force products with different hazards into one unsuitable pack. The goal is controlled variety, not one-size-fits-all packaging.
Test Under Realistic Conditions
Testing should reflect the actual distribution and customer journey. The most relevant checks here include contract proofs, press samples where appropriate, barcode scans, rub tests, and converted-pouch review. Define pass-or-fail criteria before testing: acceptable movement, no loss of closure, no product contact with sensitive surfaces, readable barcode, controlled cosmetic damage, and an agreed packing time. Include product and packaging tolerances, not only ideal samples.
For food or other sensitive products, packaging cannot establish shelf life or safety by itself. Product formulation, processing, sanitation, temperature, water activity, oxygen, and storage time can all matter. Vacuum packaging is not a substitute for required refrigeration or other safe handling. Brands should validate claims and storage instructions for the actual product. Keep dated samples, photographs, measurements, and results so approvals are traceable.
Control Cost Without Removing Essential Performance
Compare supplier prices against one written specification. Confirm material, dimensions, print, finish, closures or insert components, tooling, setup, packing quantity, freight, duties if applicable, tolerances, and lead time. A lower quote may reflect a different structure rather than a better price. Calculate total cost using assembly labor, storage, damaged goods, excess inventory, obsolete artwork, rework, and cash tied up in minimum quantities.
Short runs can reduce inventory risk but usually carry a higher unit cost. Larger runs can reduce unit price while increasing commitment. Choose quantity using credible demand, shelf-life or artwork-change risk, storage capacity, and supplier lead time. Before scaling, test a realistic pilot. Removing a necessary barrier layer, support point, or quality check to save a small amount can create a much larger operational cost.
Handle Compliance and Claims Carefully
The FDA treats packaging components that contact food as food-contact substances, and their regulatory status depends on intended use and conditions. Suppliers should be able to identify relevant materials, inks, adhesives, and barriers for the proposed application. Brands remain responsible for product labeling and claims that apply to their category. When the legal position is unclear, obtain qualified advice before production rather than relying on a generic certificate.
Environmental language also needs evidence. The FTC Green Guides address claims such as recyclable, recycled content, degradable, and compostable. Multi-material flexible pouches, windows, adhesives, coatings, foams, and combined inserts may not be accepted in every local system. Avoid broad “eco-friendly” statements. Describe the actual material or verified attribute, qualify limitations where needed, and make disposal instructions understandable.
Create an Incoming Quality-Control Routine
Approve a controlled reference sample for structure, fit, print, color, finish, and function. At receipt, inspect units from multiple cartons or rolls rather than the easiest sample on top. Check dimensions, cutting, seals or glue, registration, odor, surface damage, assembly, fit, and any closure, window, divider, or insert. Load real products periodically because empty packaging can hide failures.
Record supplier batch, inspection date, sample size, defects, photographs, and disposition. Track production measures such as packing speed, sealing rejects, damaged products, returns, complaints, and unused stock. If performance changes, investigate material, conversion, storage, equipment settings, product tolerances, and employee process before assuming one cause. Consistent records turn quality conversations into evidence and help improvements survive staff or supplier changes.
Conclusion
A successful package connects the commercial goal with product data, material performance, manufacturability, artwork, testing, cost, and compliance. For this topic, the central lesson is the path from artwork and prepress through printing, lamination, pouch conversion, and final inspection. None of these decisions should be made from an online image or a material nickname alone. Filled prototypes and written acceptance criteria reveal whether the idea works in the real operation.
The practical next step is to create one measurable brief, request a representative sample, and test it through packing, distribution, display, opening, and normal use. Record what passes, what fails, and what must change before volume production. That process helps brands protect products, control spending, present information clearly, and build a packaging system that can be repeated as orders grow.